If you have any question, please drop me an email (sonia9423@gmail.com) or Instagram @ sonianll

Monday, May 10, 2010

Egg tofu with mixed vegetables, and Happy Mothers' day

This is a quick and easy Chinese style of tofu dish.


IMG_7648


IMG_7627

Cut egg tofu into half, from the middle


remove the plastic bag, slice into few pieces

Deep fry the tofu, and place on a serving plate

cook mixed vegetables and chicken


Egg tofu with mixed vegetables
(printable recipe)

Ingredients
4 rolls egg tofu, cut into few pieces
150g chicken breast meat, cubed
150g mixed frozen vegetables, defrost and washed

Seasonings
1/2tsp light soy sauce
1/2tsp tapioca flour
A dash of white pepper powder
1/2tbsp oyster sauce
1/2tsp salt or to taste

1. Lightly marinate chicken meat with light soy sauce, pepper and tapioca flour, set aside.
2. Deep fry tofu in hot oil till golden brown, dish out, arrange on a serving plate and set aside.
3. Heat oil in a wok, stir fry chicken meat for 1min, then add in mixed veggie,some water and add in seasoning, combine well.
4. Pour chicken mixture over the fried tofu, serve hot with rice.

IMG_7631
Happy Cooking !!
Update on Mother's day-
I'm sure you all had a wonderful Mother's day celebration. Just like to share with you 2 meals that prepared by kids for me..

Breakfast-French toast and mixed fruits yogurt, not bad..

IMG_9229
-afternoon tea, Coffee with Vanilla ice cream, this is good
IMG_9238
-afternoon tea, this is really good, slightly crispy crepes, vanilla ice cream and fresh strawberry. They are just a perfect combination. Lucas even use chocolate sauce to put his signature on the serving plate, very creative..
IMG_9236

Friday, May 7, 2010

Homemade Asian basic chili paste (sambal tumis), red and hot post !!

You know I'm a Nasi Lemak Lover, I cannot live without spicy foods, especially Nasi Lemak, chicken curry, fried chicken & etc. So I use a lot of sambal (chilli paste), usually I prepare my own chilli paste and keep a big batch of chilli paste as is much easier than grind for small batch.
IMG_8852 2
My style of chili paste is very basic, dried red chili, onion, garlic and shallot.

IMG_7763


IMG_7782 1
Normally I have frozen my batch of chilli paste in small container (2tbsp each container) and just snap pieces off when required. It defrost very quickly too.


The important point of getting a good sambal is to tumis (keep stirring) the raw chili paste with oil for very long hour as to get rid of the raw chili smell and get better chili fragrant. One of my Malay friend took 2hours to prepare her sambal, can you imagine!!

IMG_8829
Homemade Asian basic chili paste (sambal tumis)
(printable recipe)

Ingredients A
300g dried red chili (cut 1” length and cooked in hot water for 10mins, remove seeds)
175ml water

Ingredients B
2 onions
10 shallots
10 cloves of garlic
50ml water

300ml cooking oil or more

1. Blend ingredients A till fine or paste texture, and set aside.
2. Blend ingredients B till fine or paste texture, and set aside.
3. Heat wok (without oil) over low flame, add in chili mixture, stir fry for 15mins.
4. Add in cooking oil, continue stir fry for another 15mins (at this time, the mixture is quite heavy and hard to stir)
5. Add in onion mixture, continue stir fry for 45mins or till oil separated from chili (at this time, the mixture is light and easy to stir)
6. Cool down completely before store in clean air tight container.Store in fridge or freezer.

My note:

I did not add any seasoning (salt,sugar & etc), belacan (shrimps paste), herbs or etc. So this basic chili paste can be used to cook chicken curry, fried Mamak noodles, fried chicken, fried fish, sweet sambal, sambal ikan bilis (anchovies) for nasi lemak and etc. You can adjust the amount of seasoning, add more shallots, onion or garlic, or to add shrimps paste or herbs, so it is very versatile, adjust according to your recipe. So this is very similar to the chili Boh that we use to buy from market here.
The best thing is I can reduce the cooking time, don't need to stir fry the chili paste while cooking, just add in and mix with other ingredients, easy and fast!!
IMG_8833 1
Happy Cooking !!

Thursday, May 6, 2010

Steamed savoury yam cake

Beside radish cake, we also like steamed savoury yam cake, both using the similar way to prepare.

IMG_9137 ts


yam paste after cooked, and the garnishing..


Coarsely chopped dried shrimps..


After taken the pictures, these two pieces of yam cake become my yummy tea break...

IMG_9171


IMG_9139
Steamed savoury yam cake(printable recipe)
Ingredients
220g yam, small cubed
250g rice flour
20g tapioca flour
450ml water
70g dried shrimps, soaked and chopped coarsely
10 shallots, slices

Seasonings
1tsp salt or to taste
1tsp sugar
1/2tsp chicken stock powder
1/2tsp white pepper powder

GarnishingChopped spring onion
Chopped fresh red chilli

1. Mix all seasonings with rice flour, tapioca flour and water by hand whisk till a watery batter.
2. Heat oil in a wok, sauté shallots till golden brown, add in dried shrimps and stir fry till fragrant.
3. Dish out half of the mixture and keep aside for later garnishing. Add in yam and stir fry for 1min. Pour in the watery batter and cook mixture for 1-2mins over low heat, stirring all the time, until the mixture turns to a thick paste.
4. Pour the paste into a greased cake tin. Smoothen the surface with a spatula. Place it in the steamer and steam over high heat for 45 minutes.
5. Remove the cake and allow it to cool thoroughly before cutting into slices.
6. Garnish with shrimp/shallot mixture, chopped spring onion and red chilli on top.
7. Serve with sweet chilli sambal (chilli sauce).
IMG_9151
Simply yummy!!

Tuesday, May 4, 2010

Oreo cup cakes, supposed Black and White but...

Today I have learnt a lesson, do not bake anything without checking the stock of the ingredients, this Oreo cup cakes supposed to be in black and white, but mine turned out to Black only, due to lacking of the ingredients while preparing the mixture....
IMG_9065
Even the colour a bit out, but the taste still good..very very Oreo lor...

IMG_9091 1
Recipe adapted from dailydelicious, due to not enough cake flour and heavy cream for frosting, so I changed it to self-raising flour and butter for frosting..

Oreo cup cakes*makes about 14 cup cakes
(printable recipe)

150g self-raising flour
1/4tsp baking soda
1/8tsp salt
120g butter, at room temperature
90g sugar (I reduced the sugar from 100g)
2 eggs
25g heavy cream
4 coarsely chopped Oreo cookies

Frosting
40g butter
2tbsp heavy cream
2tbsp icing sugar
10 finely crushed Oreo cookies

1. In a bowl, sift self-raising flour, salt and baking soda.
2. Cream butter and sugar in an electric mixer on medium speed until mixture is light and airy.
3. Reduce mixing speed to low, add eggs one at a time, mixing well.
4. Gradually add half of the dry ingredients mix until smooth, then add the heavy cream.
5. Add the rest of the dry ingredients and the chopped Oreos, mixing until batter is smooth.
6. Fill the cupcake about two-thirds full
7. Bake for 20-25 minutes at 180c, or until cupcakes are springy to the touch and a toothpick inserted in cupcake’s center comes out clean.

To makes the frosting and cup cake-place the cookies in a food processor, Pulse until fine crumbs are formed. Beat butter and icing sugar till creamy, add in heavy cream and Oreo pieces, mix well. Frost the top of each cup cake.


IMG_9075 1
Happy Baking !!

Monday, May 3, 2010

Teochew vegetables dumplings / (kuih)

Teochew veggie dumpling is another type of dim sum that I like to order when we take dim sum , especially like the smoky peanuts and crunchy sweet taste of yam bean.
Learnt how to make the dough from a Hong Kong cooking show recently..
IMG_9026 1


Dough making..

cooked filling

Teochew vegetables dumplings
*makes about 35 dumplings
(printable recipe)
Filling
300g yam bean (sengkuang), coarsely shredded
80g carrot, shredded
30g dried shrimps, soaked for 15mins
50g peanut, roasted
30g Chinese parsley, coarsely chopped
2tsbp of cooking oil
1tsp light soy sauce
1/2tsp salt or to taste
1/2tsp sugar
A dash of white pepper powder

1. Heat oil in wok, add in dried shrimps and stir fry until fragrant.
2. Add in yam bean and carrot, cook for 5mins
3. Season with light soy sauce, sugar, pepper and salt.
4. Switch off the heat, add in chopped parsley and roasted peanut, mix well and set aside

Dough
210g Tang flour 澄面粉 (Tang flour is a kind of wheat flour used in chinese cooking that is suitable for making outer layer of dumplings and buns. It is also called wheat starch. You can find it in any Chinese supermarket)

1tbsp tapioca flour
410ml water

1. Sift tang flour and tapioca flour.
2. Boil water in a pot, once water is boiled, add flour and quickly stir and switch off heat.
3. Transfer cooked dough on a work top, knead into smooth and soft dough, takes about 10mins.

To make the dumpling1. Divide dough into small portions and roll into round sheet.
2. Place suitable amount of filling on each sheet and seal the edge by pressing the dough
3. Place dumplings in a greased steamer and steam for 10mins over high heat.
4. Rest for 5mins till slightly cold, then only remove the dumpling from steamer.
5. Serve with chili sauce, yummy!

IMG_9040
Happy Cooking !!

Friday, April 30, 2010

Steamed moist chocolate cake_simply good !!

Before I started blogging, I only know how to bake butter cake, but now I have learned to bake so many type of cakes from other bloggers. I like this kind of truly sharing and exchange opinions via blogging, I learn from you and you learn from me..never ending learning..

This is a cake that I learnt from other blogger, do not need a mixer and oven, very moist and soft chocolate cake, simply good !!


IMG_8508 1


IMG_8521
Recipe adapted from Jane's corner, original recipe from Cooking Crave, Thanks so much to these two talented ladies !!

Steamed moist chocolate cake
(printable recipe)
(A) 180 g butter, 160g caster sugar, 200 g full cream evaporated milk, 1/2tsp vanilla extract & 2tbsp of rum (optional)

(B) 2 eggs, slightly beaten with fork.

(C) 100 g plain flour, 50 g cocoa powder, 1/2 tsp baking powder, 1/2 tsp baking soda.


1. Combine (A) in a saucepan. Stir over low heat until sugar is dissolved and butter is melted, turn off the fire and keep warm.
2. Add (B) into (1) and stir till well mix.
3. Sift (C) into a large mixing bowl, then pour the eggs mixture (2) over the flour and stir till well mix (cake batter should be runny).
4. Heat up the steamer.
5. Lined 8 inch round baking pan.
6. Pour the batter into the lined pan and place the pan into the steamer.
7. Cover the top of the pan loosely with a piece of aluminium foil.
8. Steam over medium heat for 45 mins.
9. Cool the cake in pan before turning out for further decoration.


IMG_8526

Happy Baking !!
Happy Weekend and Happy Labour day !!

Thursday, April 29, 2010

Savoury steamed glutinous rice_Encore!!

Today I again cook this one dish meal because my hubby is away for business trip from home, he doesn't appreciate much of this kind of rice, but me and kids just love it.

IMG_8801 1


I took these pictures at the same spot which I took the old pictures with old camera last time, but this time look better with new camera right? hehehe..

IMG_8795


Savoury steamed glutinous rice
(printable recipe)

Ingredients
500g glutinous rice (wash and soak at least 4 hours or more)
200g belly pork, cut cubed
15 shallots, peeled & sliced thinly
40g dried prawns, wash & soaked
15 dried oyster, wash & soaked & cut into cubed, (optional)
10 dried shiitake mushrooms, soaked and cut into cubed
200ml water

Seasoning:
1 tbsp dark soy sauce
2 tsp salt, or to taste
1tbsp light soy sauce
1tbsp sugar

Garnishing:
Toasted/fried peanuts
Spring onions, chopped

1. Heat the oil in a wok and fry the shallot over medium-low heat, fry till crispy and golden brown. Dish out and set aside to cool.
2. Use the remaining shallot oil in the wok. Over medium heat, stir-fry the meat, dried prawns and mushroom until aromatic.
3. Add in the drained glutinous rice, and add in the seasoning. Stirring and mix well for 1 -2 mins.
4. Transfer the rice into a steaming tray, sprinkle water on top of the rice.
5. Steam for 60mins ( stir rice for every 30mins, sprinkle some water when necessary).
6. Serve rice topped with shallot crisps, peanuts and spring onion.

-i think I will slowly replace those old pictures (very blur and blur) from old posts with new pictures later and re-post it...


IMG_8786

Happy Cooking!!

Wednesday, April 28, 2010

Yogurt sponge cup cake with Mango mousse

I have so long did not bake this yogurt sponge cake, see my old post here. This is one of the cake that I learn to bake when I start interest on baking.
IMG_8674 1
-I like cake with fresh fruit, this cake tasted very refreshing, full of fruity flavours..the sponge cake is not too sweet and not oily at all, furthermore this cake can be store in the freezer, you can serve this as a dessert too.


IMG_8682

-The mango mousse was adapted from Happy Home Baking, but made little changes on it because I run out of yogurt, so i replaced it with yogurt drink.

Yogurt sponge cup cake with Mango mousse
(printable recipe)

Yogurt sponge cup cake
4 egg yolks (medium)
10g Castor sugar

4 egg whites (medium)
60g Castor sugar
1tsp corn flour

120g Natural yogurt (or other flavours)
60g Cake flour/Superfine flour
10g Corn flour
40g Corn oil

1) Beat egg yolks and sugar till thick and pale in color, add in yogurt and mix well, set aside.
2) Beat egg white until foamy, gradually add in sugar and continue beat till fluffy. Add in corn flour and beat till soft peaks.
3) Stir a big spoonful of egg whites mixture into the egg yolk batter and gently stir with hand whisk to lighten the batter.
4) Then with a spatula, scoop gradually the remaining egg whites mixture and fold well with egg yolk batter.
5) Sift cake flour and corn flour, and gradually fold into batter.
6) Last add in corn oil and fold gently into batter.
7) Bake in pre-heat oven at 160c for 25mins if using paper cups(40mins if using baking pan).


Mango mousse filling300g fresh mango (use sweet, ripped fruits)
2 tablespoons caster sugar
140g yogurt drink or fresh milk
1 tbsp and 2tsp gelatin powder
60ml water

1. Measure water in a bowl, sprinkle gelatine into water, set aside for 10mins.
2. Melt in a bowl over a pot of simmering hot water, set aside to cool.
3. Blend mangoes, sugar and yogurt until smooth.
4. Add in gelatine solution to the mixture, mix well.

To assemble the cake- trims off some sponge cake from the cup, spoon mango mousse filling to cover the cup cake. Leave to chill in the fridge for several hours or till set. Keep the cake in the fridge before serving.

My note- To bake the cup cakes first and set aside till cool to room temperature, then only start to prepare mango mousse filling.


-it is normal when sponge cake shrink a bit after baked


-trim off some cake and cover with mango mousse filling. In order not to waste, you can just mix the excess cake and balance mango mousse together, and it become a yummy mango cake pudding !! try it out.


IMG_8689
HAPPY baKING !!

Monday, April 26, 2010

Stir fried tofu with red cherry tomatoes

Saw this dish in a travel show, tried to cook this dish at home and I have been cooked this dish for several times, love the flavours of sour, sweet and salty. I would say this is a vegetarian version of a dish that I cooked earlier- 4321 Fragrant garlic belly pork.

IMG_7930 1


IMG_7922

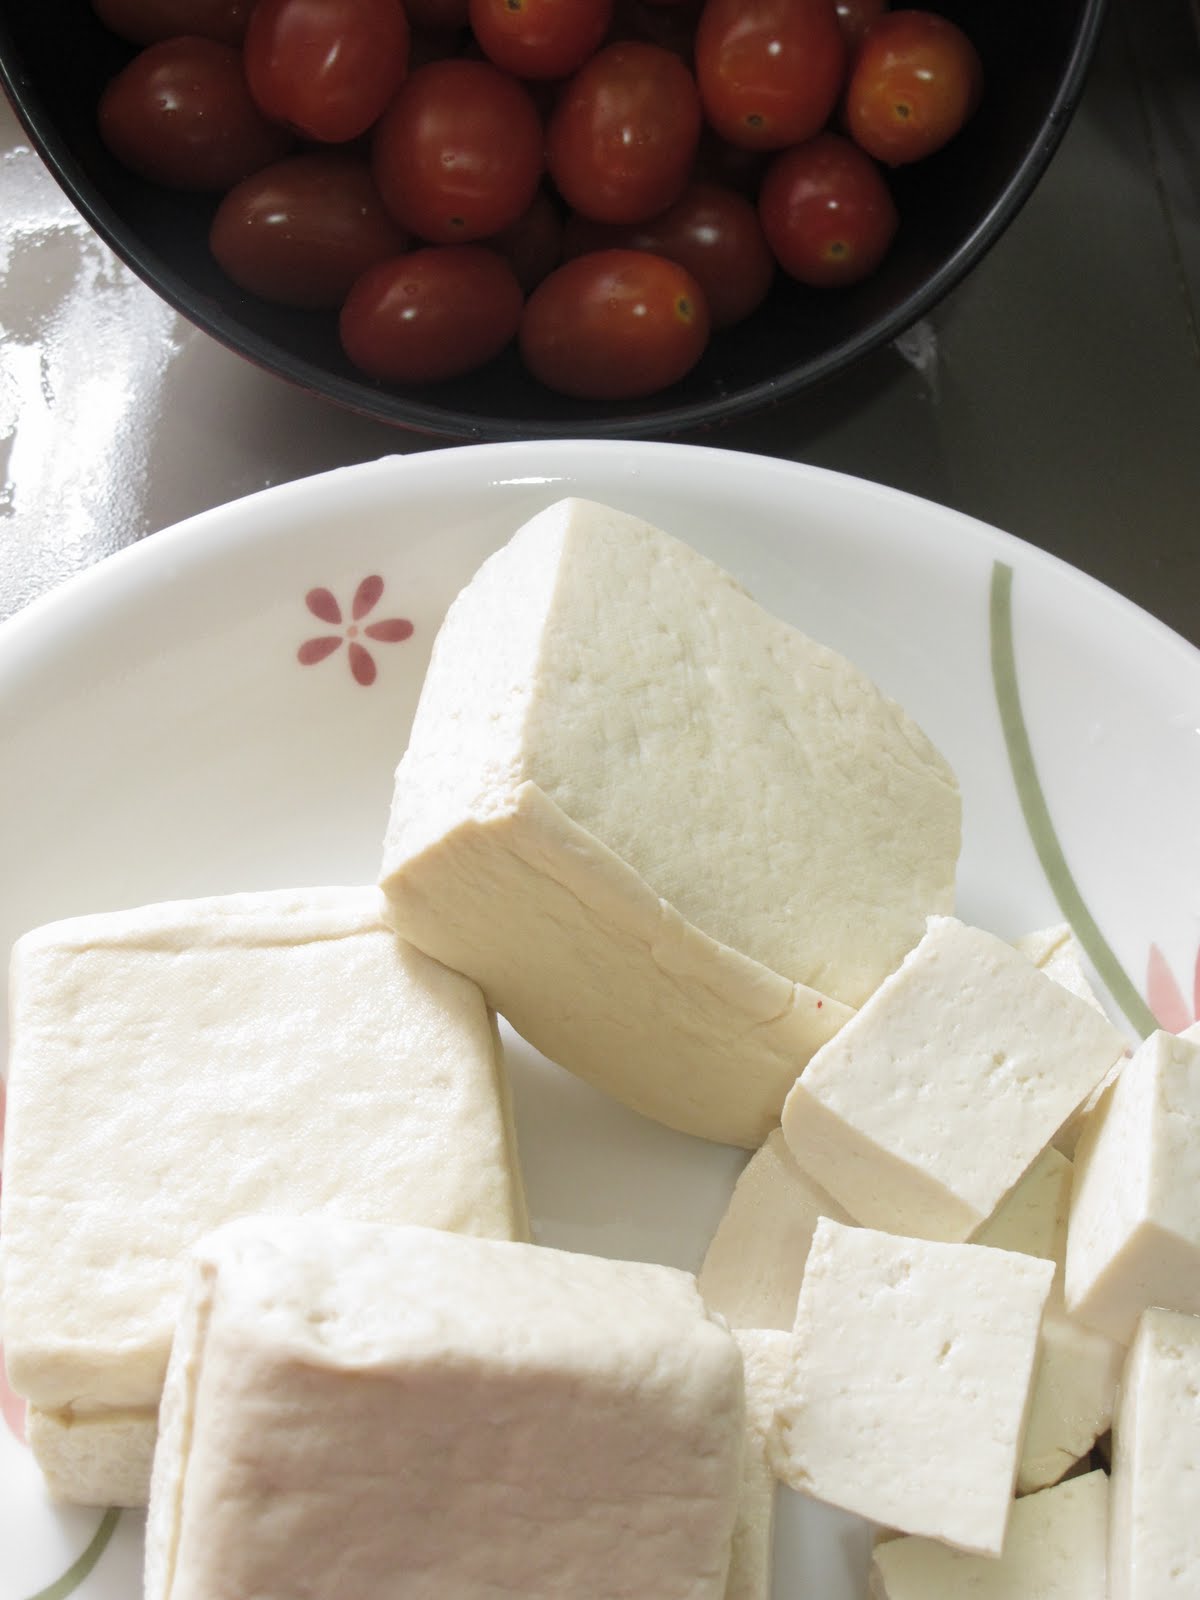
-firm tofu and red cherry tomatoes


-deep fry firm tofu pieces

-stir fry red cherry tomatoes


-mix well all ingredients


Stir fried tofu with red cherry tomatoes
(printable recipe)

Ingredients
4 firm tofu (beancurd), cut 1 piece tofu into 8 small square pieces.
250g red cherry tomatoes
2 stalks spring onion, cut 1” in length
3 slices of young ginger
2 cloves of garlic, chopped

Seasoning
1tbsp light brown sugar
2tbsp light soy sauce
1 and ½ tbsp rice vinegar
1tsp Chinese rice wine
A pinch of salt to taste

1. Deep fry firm tofu in hot oil till golden brown, set aside.
2. Add red cherry tomatoes in the remaining oil, stir fry for 1-2mins.
3. Add in ginger slices and chopped garlic, mix well.
4. Add in brown sugar, stir fry for 1min.
5. Pour in the fried tofu, mix well.
6. Season with light soy sauce, vinegar, rice wine and salt.
7. Cook till sauce slightly thicken, add in spring onion, dish out.
8. Serve hot.
IMG_7919 1
Happy Cooking !!!

Friday, April 23, 2010

Fish cake and fish balls noodle soup

I like to order this type of fish cake noodles soup in one of the restaurant nearby my area, they serve very fresh fish balls and fish cake. Yesterday i just imitated this noodle soup at home since I bought a fresh Spanish mackerel from the market.

IMG_8618 1

-Fish cake after pan fried

IMG_8603

-Fish cake slices..

IMG_8608

Fish cake and fish balls noodle soup
(printable recipe)

To make fish paste-
600g fish meat, Spanish mackerel, (ikan tenggiri)
60ml ice water
2tsp salt or to taste
1/2tsp white pepper powder
1/2tsp sesame oil
1tsp sugar
2tsp tapioca flour

1. Mix all ingredients except fish meat in a small bowl, mix well.
2. Place fish meat in another large mixing bowl.
3. Gradually add in liquid mixture into fish meat, stir the fish meat till all combine together.
4. Slap the fish meat against the sides of the mixing bowl several times or until mixture is well combined and sticky, takes about 5mins.

To make fish ball – Wet your hand in a small bowl of salt water, scoop up the flesh and shape like a golf ball size and cook in the broth or a pot of boiling water. The fish ball is thoroughly cooked when it floats on the water surface.

To make fish cake- Wet your hand in a small bowl of salt water, scoop up the flesh and shape long round size. Steam over hot water for 10mins and pan fry in hot oil till golden brown.

To make the bowl – Bring broth to boil (make broth by boiled dried anchovies, salted veggie and water), fill bowl with noodles, fish balls, fish cake slices and small piece of seaweed. Ladle the hot broth into bowl. Garnish with fresh veggie and garlic oil. Serve hot.

**Do try out this healthy and fresh noodle soup !!

IMG_8614

-took a picture when Desmond concentrated doing his homework (writing Chinese letters) from Kindi, this is the moment he can sit still...
IMG_8545

Happy cooking and Have a nice weekend ahead...
Blog Widget by LinkWithin